Collaborating on a project
Git workflow is the basis that supports the entire development process, promoting the collaboration among team members while avoiding redundant tasks in a distributed environment. It consists in a set of steps outlined in the following document:
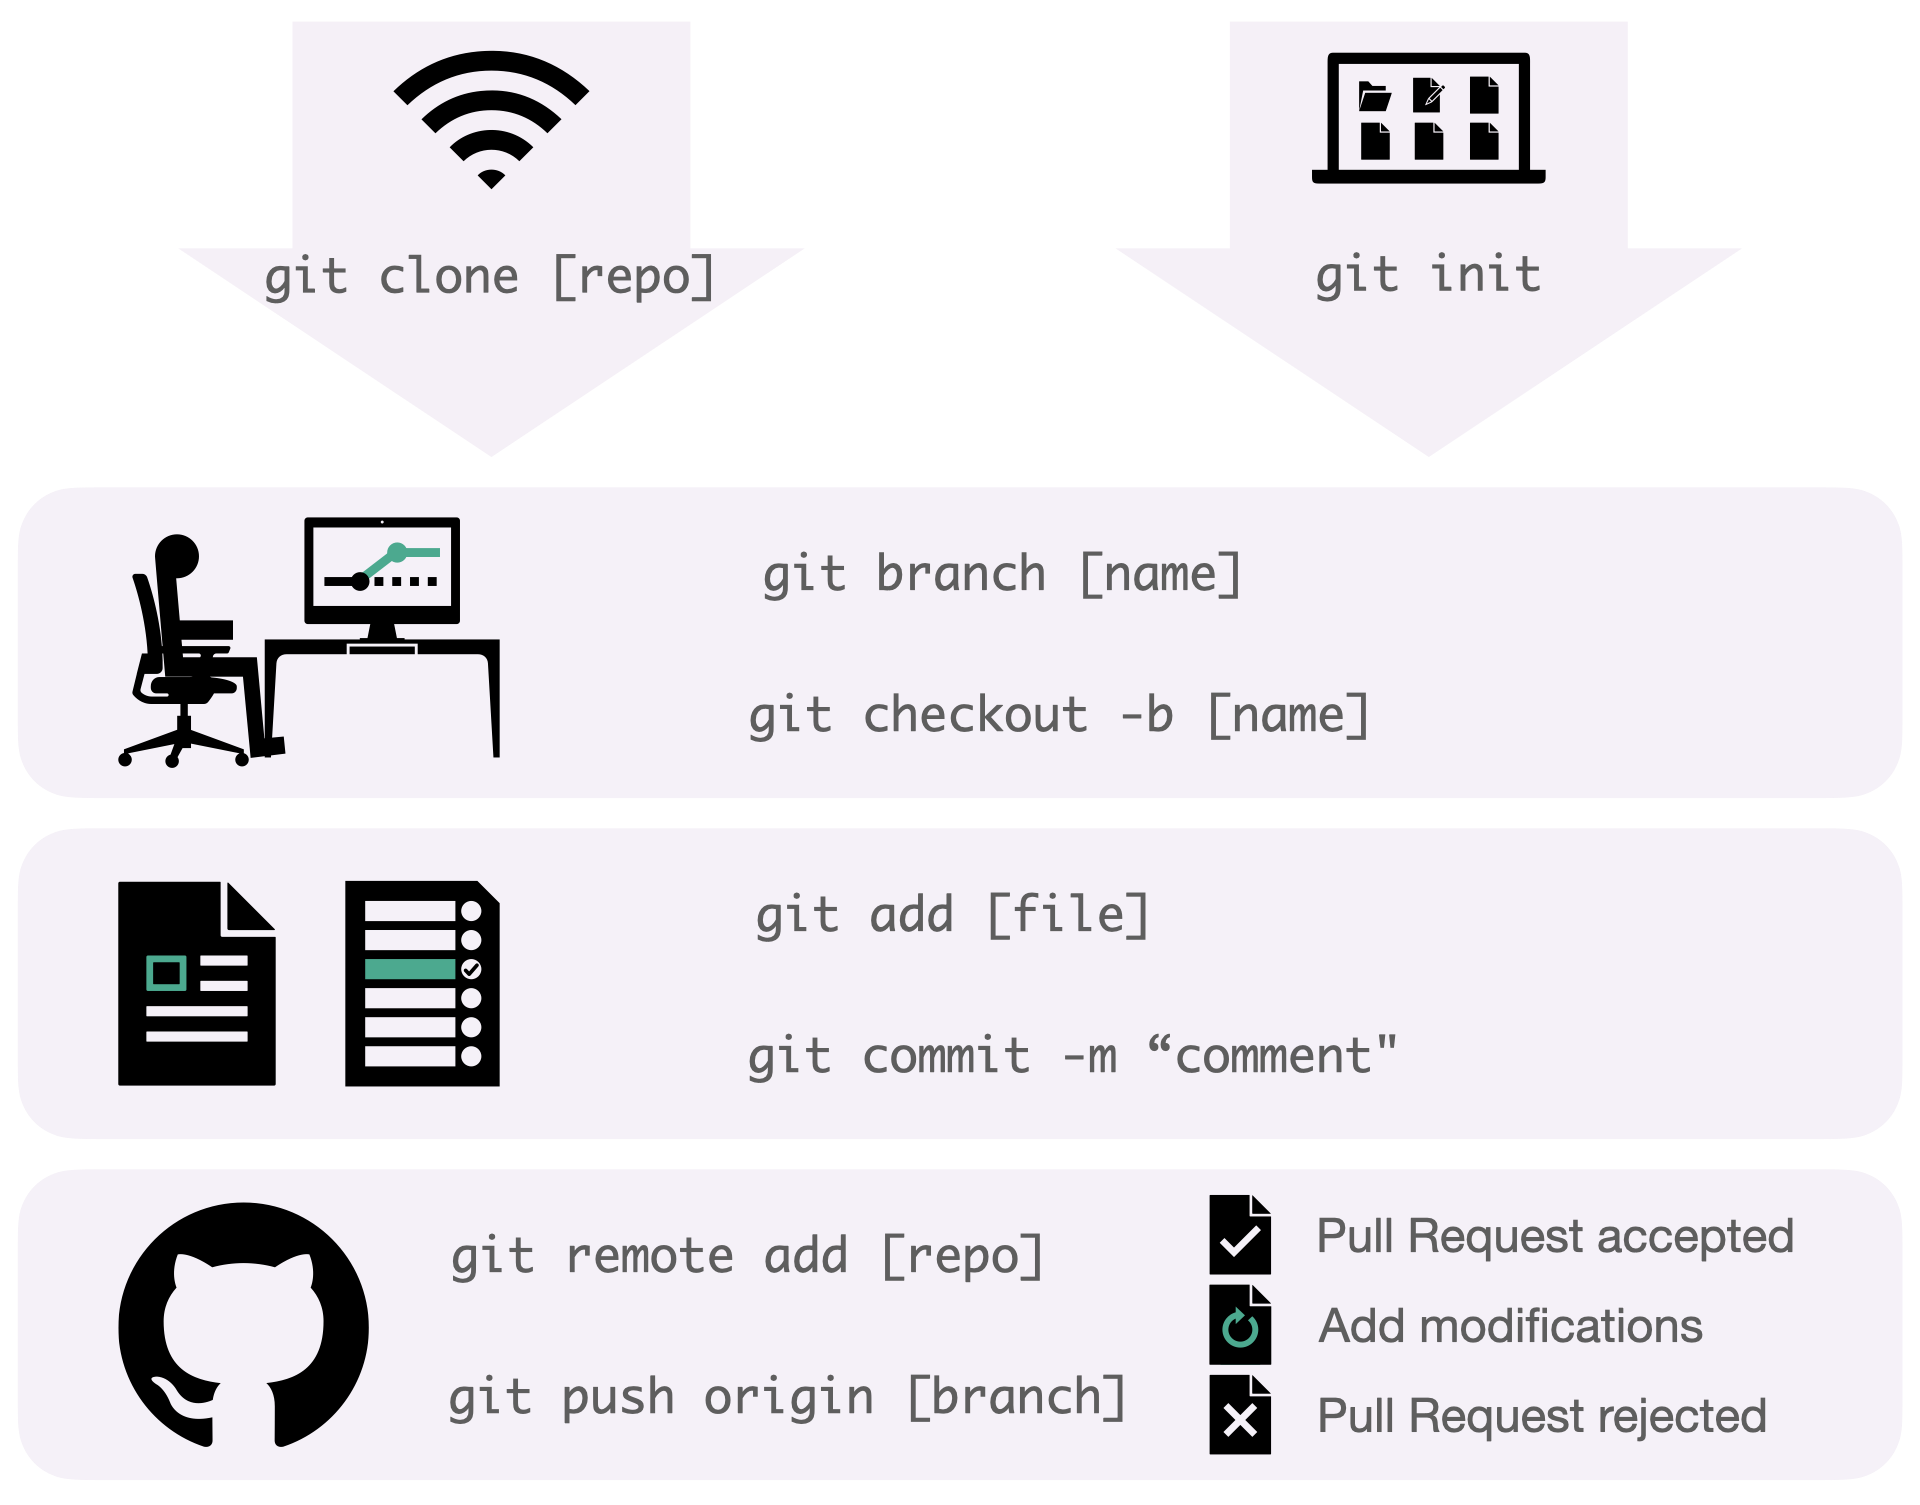
Git workflow
SETUP: Download an online repository using
git clone [url repo], or start your own local Git repository usinggit init.BRANCH: Create your safe environment using
git branch [branch-name]. This isolates your local work and allows testing additional features.STAGE & COMMIT: Stage your recent work using
git add [modified-file]and save it withgit commit -s -m "[comment]".SHARE: Time to upload your project. Add a Git URL using an alias with
git remote add [alias] [url repo]in case that your project had been started locally. Upload your local branch commits to the remote repository usinggit push [alias] [local-branch].REVIEW: Launch a new Pull Request to publicize your modifications and start a reviewing process. This opens a discussion with your teammates concerning the correctness of your changes. If the proposal succeeds, your modifications will be merged into the main line. Reviewers can ask you to include extra adjustments to approve your code.
Remember
When committing, the tag -s/--signoff is necessary in our organization to pass the DCO automatic check in the CI pipeline.
Open an issue
We use issues to keep track of the evolution of our software projects. We should create an issue describing the new functionality/fixes that we want to add to the code base. This ensures that every relevant contribution can be discussed and documented.
The Issues will document all the discussion and design decisions that we make when deciding what we want to fix/improve in our projects. In the Pull Requests, we will discuss how that changes are implemented.
Minor modifications can be discussed directly in the Pull Request. There is no need to open an Issue describing changes that take less than 4 hours to implement, such as:
Fixing typos or minor improvements in the documentation.
Small bugfixes.
Refactoring variable names.
Adding an additional test.
Create a new branch
On your local clone of the repository, create a new branch from the latest upstream master branch commit of the repository you need to work on.
We do not enforce any particular branch naming policy, but we recommend using prefixes,
like fix, feature or docs, for example.
Development and Pull Requests
Work on your local repository as you see fit. When the time comes to make the Pull Request:
Rearrange your commits to improve its readability: squash similar changes into individual commits and try to keep the overall commit count at a minimum.
Choose a short, descriptive title that summarizes the contents of the Pull Request.
If the Pull Request is addressing an Issue, make sure to reference it in the first Pull Request comment.
Assign the Pull Request to yourself and ask for a review.
Code review and requested changes
Reviewers
The project maintainer or a designated reviewer will review Pull Requests.
After a code review, add the requested changes in a new commit. This is useful because it’s possible to check again only the specific changes that the reviewer requested. When your Pull Request is approved, rearrange all the commits to have a descriptive history of your changes. Also, rebase your Pull Request with the master branch.
Avoiding cascading delays when submitting Pull Requests that depend on one another
If you want to submit several Pull Requests that depend on one another, and you don’t want to wait for the revisions of the former to submit the latter, you can, as an exceptional measure, submit them without waiting to rebase them against master, so each of them will depend on the changes of the previous ones.
Always add a comment to the Pull Request showing that it depends on other Pull Requests that must be merged first.
To merge this kind of Pull Request, you need to know how to use the
rebase -i git command:
(Maintainers only) Merge into master the first Pull Request in the dependency chain.
Because this Pull Request is merged using squash, you need to rewrite your Pull Request commit history removing old commits from the previous Pull Request and adding the squashed one from master. Using
rebase -icommand is a simple task.